Every consistently profitable trader has one thing in common: a documented, rule-based strategy they follow without deviation. Not a feeling. Not a "setup that looks good." A set of specific, repeatable conditions they have proven — through hundreds of historical trades — produces a positive expectancy.
Building and backtesting a strategy is the most important work you will ever do as a trader. It is also the work that almost nobody does properly. This guide fixes that.
1. Why You Need a Rule-Based Strategy
Gut-feel trading has a fatal problem: you cannot improve what you cannot measure. If your entries are based on "it just looked right," you have no way to know whether your losses are bad luck or a fundamentally broken approach. You cannot fix what you cannot define.
A rule-based strategy solves this by making every decision objective and repeatable. When every entry, every exit, and every stop loss follows a written rule, you can go back through history and answer the question that actually matters: does this produce positive expectancy over hundreds of trades?
What Rule-Based Trading Looks Like in Practice
A poor strategy description: "I buy when the market looks bullish and the trend is up."
A proper rule-based strategy entry: "I enter long when price closes above the 20-period EMA on the 1H chart, the daily trend is bullish (price above the 50 EMA on D1), and the RSI(14) is between 45 and 65 at the time of the close."
The second version is testable. The first is not. If you cannot write your strategy in a way that a stranger could execute it without asking a single question, your rules are not specific enough.
Gut-feel trading often produces inconsistent results that feel random — because they are random. You might have a great month, but you cannot replicate it or understand why it happened. Rule-based trading is the only way to build something you can actually trust on a funded account.
2. Step 1 — Define Your Edge
Before you write a single rule, you need to answer a foundational question: what market condition are you trying to exploit? Every profitable strategy is built on one of three core edges.
Trend Following
Trend following strategies assume that markets in motion tend to stay in motion. You are looking for an established trend on a higher timeframe and trading pullbacks or continuation patterns in the direction of that trend. This is one of the most robust edges in trading because trends are a structural feature of markets driven by capital flows, central bank policy, and institutional positioning.
Best for: Forex majors (EUR/USD, GBP/USD), indices (S&P 500, NASDAQ), metals (XAU/USD). Works best on H4, Daily, and Weekly timeframes.
Mean Reversion
Mean reversion strategies assume that price that has moved too far from its average will return to it. You are looking for overextended moves — high RSI, price far from a moving average, or extreme sentiment readings — and fading them. This edge works well in ranging, low-volatility environments but can destroy you in trending markets if you are not careful about filters.
Best for: Pairs in consolidation, commodities with seasonal ranges. Works best on M15–H1 timeframes with a strong range filter.
Breakout Trading
Breakout strategies aim to catch the beginning of new trends by entering when price breaks through a key level of support or resistance with momentum. The challenge with breakouts is false breakouts — many apparent breakouts reverse quickly. The best breakout strategies include confirmation filters (volume, retests, or higher-timeframe alignment) to reduce false signals.
Best for: Opening range breakouts (London, New York open), daily high/low breakouts, key weekly levels. Works best on M15–H1.
Timeframe Selection
Your timeframe determines the character of your trading — how often you get signals, how long you hold trades, and how much noise you filter out.
| Timeframe | Trades per Month | Avg Hold Time | Best For |
|---|---|---|---|
| M5 – M15 | 40–100+ | Minutes–Hours | Scalping, intraday breakouts |
| H1 – H4 | 15–40 | Hours–2 Days | Swing entries, trend following |
| Daily | 4–15 | Days–Weeks | Position trading, macro trends |
| Weekly | 1–4 | Weeks–Months | Long-term trend following |
For prop firm trading, the H1–H4 timeframe is often the sweet spot: enough signals to gather backtest data efficiently, but not so many that slippage and commissions eat your edge. Daily signals are cleaner but you will need years of data to get 100 trades.
Asset Selection
Not all markets behave the same way. Your strategy will perform differently on different instruments. Choose 2–4 instruments to specialise in, test your strategy specifically on those, and do not assume it works on everything.
- Forex majors (EUR/USD, GBP/USD, USD/JPY) — High liquidity, tight spreads, trend well on higher timeframes. Best for trend following and breakout strategies.
- Indices (US30, NAS100, SPX500) — Strong trending behavior, react strongly to macro events. Good for trend following; beware of overnight gaps.
- Metals (XAU/USD) — Gold is a high-volatility instrument that trends strongly and respects key levels well. Popular for breakout and trend strategies. Wider spreads than forex majors.
- Commodity currencies (AUD/USD, USD/CAD) — Correlated with commodity prices, can offer unique edges not found in EUR/USD.
When starting out, focus on one instrument and one timeframe until you have 100+ backtested trades. Spreading too thin too early gives you weak data on many instruments rather than strong data on one. Master one edge before expanding.
3. Step 2 — Write Your Trading Rules
This is where most traders stumble. Writing rules feels simple, but the moment you start backtesting you will discover your rules have gaps — situations the rules do not cover. That is normal. The backtesting process will force you to close those gaps.
Entry Rules
Entry rules define exactly when you open a position. They must be 100% objective — no "looks good" or "strong momentum." Examples of rule-based entries:
- MA Crossover: "Enter long when the 9 EMA crosses above the 21 EMA on the H1 chart, while price is above the 200 EMA on the same timeframe."
- S/R Breakout: "Enter long on a candle close above a weekly resistance level that has been tested at least twice, with the close being within 0.3% of the level."
- Candlestick Pattern: "Enter long on a bullish engulfing candle that forms at a daily support level, with the body being at least 1.5x the average body size of the previous 5 candles."
- Pullback Entry: "Enter long when price pulls back to the 21 EMA during an uptrend (price above 50 EMA on D1) and forms a pin bar or inside bar on the H4 chart."
Stop Loss Rules
Your stop loss must be placed at a level that proves your trade thesis wrong — not at a level that is "comfortable" or represents exactly 1%. Structure-based stops are more robust than fixed-pip stops:
- Structure-based: "Stop goes below the most recent swing low (for longs) with a 3-5 pip buffer."
- ATR-based: "Stop placed at 1.5x ATR(14) below entry."
- Level-based: "Stop placed 5 pips below the support level the entry is based on."
Take Profit / Exit Rules
Exit rules are often more important than entry rules — a great entry with a poor exit produces mediocre results. The three main approaches:
- Fixed R:R target: "Take profit at 2x the distance of my stop loss." Simple, consistent, and easy to backtest. Best for beginners.
- Trailing stop: "Move stop to breakeven after 1R gained. Trail stop to most recent swing low on each new higher high." Lets winners run in trending markets.
- Level-based exit: "Take profit at the next major resistance level." Requires judgment but can improve R:R on the right setups.
- Time-based exit: "Close any open trade at end of session (5 PM EST) regardless of profit or loss." Useful for avoiding overnight gaps.
Example Rule Sheet Template
- Strategy Name & Version: Name your strategy and version it so you track changes.
- Instrument(s): EUR/USD, XAU/USD — list every instrument you tested and trade.
- Timeframe: Entry TF + bias TF (e.g., H1 entry, H4 bias).
- Market Condition Filter: How do you know when the strategy is valid? (e.g., "Only trade when D1 is trending — price above/below 50 EMA")
- Entry Rule(s): Exact, objective conditions. List every criterion.
- Stop Loss Rule: Where and how. No "approximately" or "roughly."
- Take Profit Rule: Fixed target, trailing stop, or level-based — pick one and define it precisely.
- Maximum Risk Per Trade: % of account. Define this before you backtest.
- Trading Sessions: London only? New York? Both? Define which sessions you trade.
- News Filter: Do you avoid trading around high-impact news? (Mandatory for FTMO traders.)
Avoid rules with multiple AND conditions that all require human judgment (e.g., "price looks like it's reversing AND momentum seems to be slowing AND the trend appears weak"). Each subjective qualifier makes your backtest unreliable — you will unconsciously interpret ambiguous rules differently in hindsight versus in real time.
4. Step 3 — Manual Backtesting on TradingView
Manual backtesting means going through historical price data bar by bar, applying your rules exactly as written, and logging every trade you would have taken. It is time-consuming. It is also the most valuable thing you can do as a trader.
How to Use TradingView Bar Replay
Load Your Chart and Set Up Indicators
Open TradingView, select your instrument and timeframe, and add the exact indicators your strategy uses. Save this as a chart template so your setup is consistent across sessions.
Scroll Back to Your Start Date
Go back at least 1–2 years. For daily strategies, go back 3–5 years to get enough trades. Click the Bar Replay button (the play icon on the toolbar) and click on a candle to set your starting point. TradingView will hide all data after that candle.
Advance Bar by Bar
Press the right arrow key or click the play button to advance one candle at a time. At each candle close, ask: "Do my entry rules trigger here?" If yes, log the trade immediately — don't look ahead.
Log Every Trade in a Spreadsheet
As you advance through history, log every triggered signal. Include date, direction, entry price, stop price, target price, and outcome. Screenshot your entry and exit on every trade.
Record the Result and Keep Going
Once you have advanced far enough to see the trade result (stop hit or target hit), log the R result (e.g., +2R, -1R). Close the trade entry and continue advancing. Never skip a valid signal — every signal counts.
What to Log in Your Backtest Spreadsheet
Your backtest log is your raw data. The more detail you capture now, the more insight you can extract during analysis. Here is the minimum required for each trade:
| Column | What to Record | Example |
|---|---|---|
| Date & Time | Candle close that triggered entry | 2024-03-12 14:00 |
| Instrument | The pair or asset traded | EUR/USD |
| Direction | Long or Short | Long |
| Entry Price | Exact entry level | 1.08450 |
| Stop Loss | Exact stop level | 1.08200 |
| Take Profit | Exact target level | 1.08950 |
| Risk (pips) | Distance from entry to stop | 25 pips |
| Reward (pips) | Distance from entry to target | 50 pips |
| R:R Ratio | Reward / Risk | 2.0 |
| Outcome | Win / Loss / Breakeven | Win |
| R Result | Outcome in R multiples | +2R |
| Notes | Anything unusual about the setup | Pre-NFP pullback |
How Many Trades Do You Need?
The minimum is 100 trades. With fewer than 100 trades, your results are dominated by variance and tell you very little about your actual edge. Here is a practical guide:
- 50 trades: Preliminary indication only. Do not draw conclusions. Keep going.
- 100 trades: Minimum viable dataset. Sufficient to make initial decisions about whether to continue refining or abandon.
- 200 trades: Good confidence level. If your metrics are positive at 200 trades across at least one full year of data, you have something worth forward testing.
- 300+ trades: High confidence, especially if spread across multiple market conditions (trending, ranging, high volatility, low volatility).
On TradingView, you can set the Bar Replay to play at 2x or 4x speed to fast-forward through periods with no signals. Just make sure to slow down near potential setup zones. Use the keyboard shortcut (right arrow) for precise single-bar advancement when you see a potential signal forming.
5. Step 4 — Analyzing Backtest Results
Once you have your trade log, the real work begins: turning raw data into insight. Most traders look only at win rate and total profit. That is not enough. Here are the metrics that actually matter.
Key Metrics Explained
| Metric | Formula | Minimum Target | Excellent |
|---|---|---|---|
| Win Rate | Wins ÷ Total Trades | 40%+ (with 2:1 R:R) | 55%+ |
| Average R:R | Avg Win ÷ Avg Loss | 1.5:1 | 2:1 or higher |
| Expectancy | (Win% × Avg Win) − (Loss% × Avg Loss) | > 0 (any positive) | > 0.5R |
| Profit Factor | Gross Profit ÷ Gross Loss | 1.5 | 2.0+ |
| Max Drawdown | Peak-to-trough in R or % | < 15% | < 8% |
| Longest Losing Streak | Max consecutive losses | < 8 trades | < 5 trades |
| Avg Trades per Month | Total trades ÷ Months backtested | Enough to recover drawdowns in < 3 months | — |
Expectancy: The Most Important Formula in Trading
Expectancy tells you what you expect to make on average per dollar risked. A positive expectancy means you have an edge. A negative expectancy means you will lose money over time, no matter how large your wins occasionally are.
Example: Your backtest shows a 45% win rate, average win of 2R, and average loss of 1R.
This means that for every $100 you risk, you expect to make $35 on average over many trades. That is a solid, tradeable edge.
Profit Factor
Profit factor is the ratio of your total gross profit to your total gross loss. It is one of the clearest single-number summaries of strategy quality:
- Below 1.0: Strategy loses money. Do not trade this.
- 1.0 – 1.25: Marginally profitable. Commissions and slippage likely make this a losing strategy in live trading.
- 1.25 – 1.5: Decent. Worth refining and forward testing but not yet strong enough for a prop firm account.
- 1.5 – 2.0: Solid edge. This is the range most professional discretionary traders operate in.
- 2.0 – 3.0: Excellent. A strategy at this level should be protected — do not over-optimise it.
- Above 3.0: Extraordinary — or more likely, curve-fitted. Be very suspicious of anything above 3.0 without extensive out-of-sample testing.
Curve fitting happens when you tweak your strategy rules so much to fit historical data that the strategy has "memorised" the past rather than identified a real edge. Warning signs: profit factor above 4–5, complex rules with very specific parameter values (e.g., "enter when RSI is exactly between 48 and 53"), or results that are spectacular on one year of data but fall apart on another. Always test on data you did not use to develop the strategy.
Understanding Max Drawdown in Your Backtest
Max drawdown is the largest peak-to-trough decline in your backtest equity curve. It tells you the worst losing streak your strategy has historically produced — and what you should expect to survive in live trading.
If your backtest shows a maximum drawdown of 12% over two years, you should assume you will face something similar (or worse) in live trading. Build your risk per trade accordingly. For prop firm traders, your strategy's historical max drawdown must fit comfortably within the prop firm's max drawdown limit. If your strategy has produced 8% drawdowns historically and FTMO allows 10%, you are cutting it very close. Consider reducing risk per trade to create buffer.
Drawdown Calculator
Calculate how much you need to make back after a drawdown, and what win rate you need to recover.
6. Step 5 — Forward Testing
A backtest tells you how a strategy performed on historical data. A forward test tells you how it performs on data it has never seen. This distinction is critical: many strategies that look great in backtests fall apart in forward testing because the rules were subtly optimised to fit the history they were tested on.
Why Forward Testing Is Non-Negotiable
Forward testing — also called paper trading or demo trading — is the bridge between your backtest and live capital. It forces you to execute signals in real time, without the ability to look ahead. It reveals gaps in your rules that you will only discover when the market throws a situation your historical test did not cover.
It also builds your psychological readiness. There is a significant difference between logging trades in a spreadsheet from historical data and watching a live position move against you while you wait for your rules to resolve the trade. Forward testing builds the discipline you will need to follow your rules under pressure.
How Long to Forward Test
- Minimum: 20–30 trades in live market conditions before risking any real capital.
- Recommended: 50+ trades across at least one month of live conditions, including at least one period of high volatility or a major macro event.
- For prop firm attempts: Do not attempt a funded challenge until your forward test matches your backtest results within 20–30%. If your backtest shows 55% win rate and your 50-trade forward test shows 38%, something is wrong — do not proceed.
What to Compare Between Backtest and Forward Test
After your forward test, compare these metrics to your backtest results:
- Win rate: Should be within 10–15% of backtest. Large divergence suggests curve fitting or execution issues.
- Average R:R: Often slightly lower in forward testing due to slippage and the difficulty of getting exact fills. This is normal.
- Profit factor: Should be within 20–30% of backtest. A forward test profit factor that is dramatically lower indicates the backtest edge may not be real.
- Losing streaks: Pay close attention. How did it feel during the worst 5-trade losing streak? Could you follow your rules? If not, your position sizing may need adjustment.
Your forward test (50+ trades) shows a positive profit factor that is within 30% of your backtest, you experienced at least one losing streak of 4+ trades and followed your rules without deviation, and you can explain every trade decision by pointing to a specific written rule.
7. Step 6 — Knowing When the Strategy Stops Working
Every strategy goes through periods of underperformance. The hardest question in trading is: is this a normal drawdown, or has my edge stopped working? Most traders either quit too early (during normal variance) or keep trading a broken strategy too long (denial). Here is how to make this decision objectively.
Set Strategy-Level Drawdown Limits Before You Go Live
Before your first live trade, write down the answer to this question: "At what point will I pause this strategy to review it?"
A good rule of thumb: pause the strategy if your live drawdown exceeds 1.5–2x your historical maximum drawdown. If your backtest's worst drawdown was 8%, you pause and review if live drawdown reaches 12–16%. This is a strategy-level limit, separate from your account-level prop firm rules.
Pause when you hit your pre-defined strategy drawdown limit. Review your rules. Look for whether the market regime has changed (e.g., a trending strategy in a ranging market). Abandon when your review reveals either: (1) your rules have structural flaws you missed, (2) the market conditions that created your edge have permanently changed, or (3) you cannot follow your rules consistently under real trading pressure.
Signs the Strategy May Be Broken (Not Just Losing)
- Win rate has dropped by more than 15% from backtest for 50+ trades — Your entry criteria may no longer align with current market behavior.
- Average R:R has collapsed — Targets are being hit less often, or stops are being hit more quickly, suggesting market volatility has changed.
- Drawdown exceeds 2x your historical maximum — The market may be in a regime your strategy was never tested in.
- You cannot follow the rules — If you are constantly second-guessing entries or exits, the problem may be psychological rather than strategic. This requires a different kind of intervention.
Checking for Market Regime Change
Before abandoning a strategy, always check whether the market has shifted into a condition your strategy was not designed for. A trend-following strategy will underperform significantly in a ranging, low-volatility market — that does not mean it is broken. It may need a regime filter added. A simple ATR comparison (current ATR vs. 3-month ATR average) can tell you whether volatility is unusual.
Risk/Reward Calculator
Quickly verify that your backtest setups meet your minimum R:R requirement before logging them.
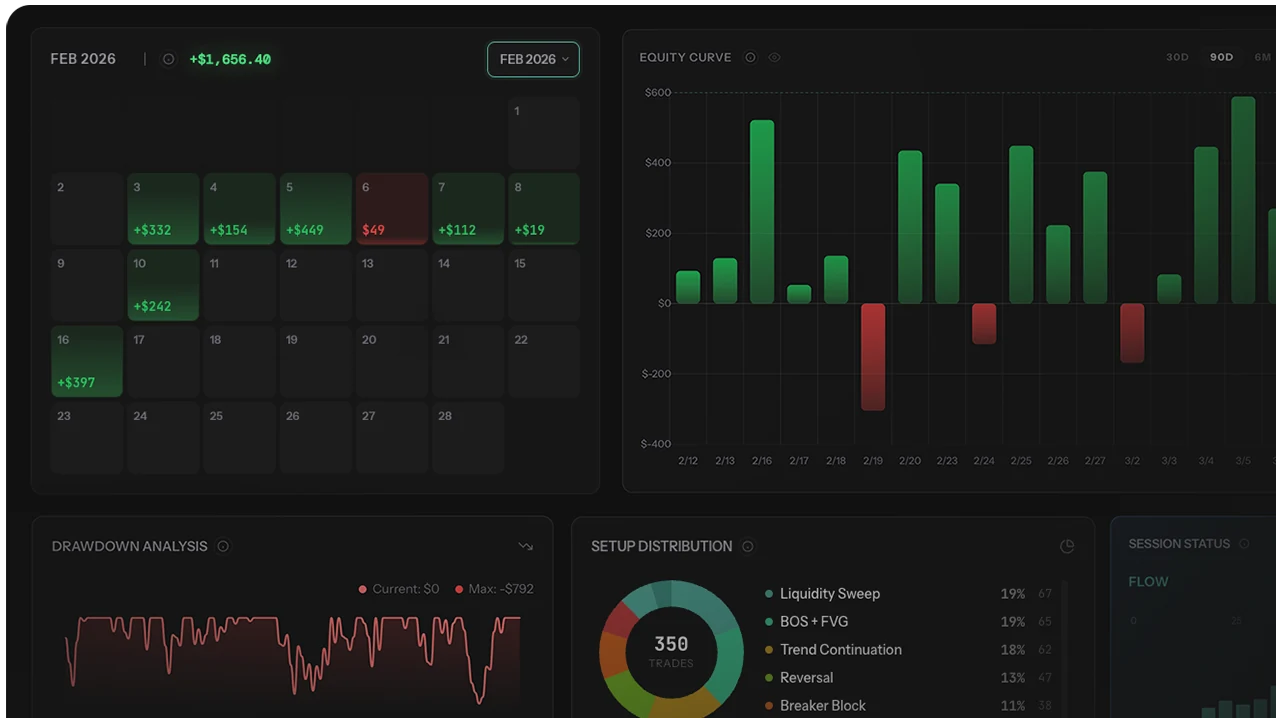
8. How TSB Pro Tracks Strategy Performance
Backtesting and forward testing get you to the starting line. But once you are trading live — on a prop firm challenge or your own account — you need ongoing visibility into whether your strategy is performing as expected. That is where TSB Pro becomes essential.
TSB Pro automatically calculates your live trading metrics — win rate, average R:R, expectancy, profit factor, and drawdown — updated in real time from your trade journal. You can track multiple strategies separately, compare your live performance against your backtest baseline, and get alerts when your metrics deviate from expected ranges.
- Strategy tagging: Log every trade with a strategy tag. See which setups are performing and which are dragging down your results.
- Expectancy tracking: Your rolling expectancy updates with every trade, so you always know whether your edge is intact.
- Drawdown monitoring: TSB tracks both account-level drawdown (to manage prop firm rules) and strategy-level drawdown (to manage your edge).
- 30-day audit tool: Review every trade in a structured format to identify patterns in your winners and losers.
The difference between a trader who is guessing and a trader who is managing their business is data. TSB Pro gives you the data layer that turns your trading journal into a performance management system.